In-track measuring system for wheel profiles on railway vehicles
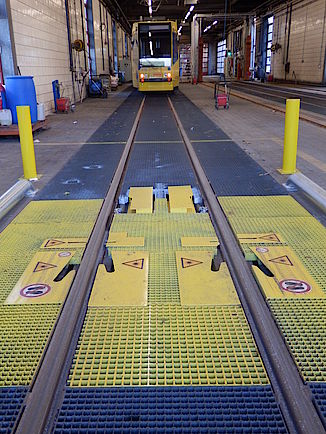
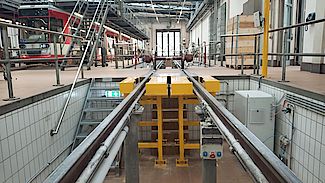
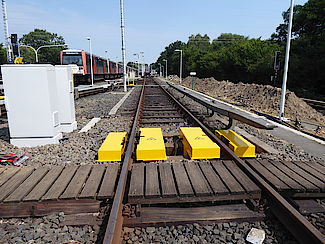
- In-track installed online measuring instrument for wheel profiles
- Easy integration with only slight modifications to the existing rail
- Recording and qualitative evaluation of the complete wheel profile whilst driving over
- Drive over speed up to 45 km/h
- Vehicle detection by transponder
- Immediate determination and display of wear characteristic dimensions
- Wear analysis
- Maintenance forecast
- Can be used for railways and tramways including low-platform vehicles
- Online laser measuring system for monitoring wheel profiles in-track
Requirements of online wheel profile measurement
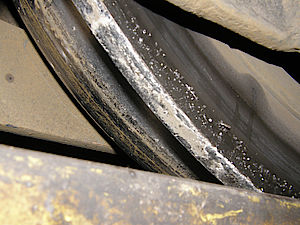
Wheels – probably one of the most important units of all rail vehicles, are exposed to high mechanical stress and therefore have a decisive influence on the running behaviour and driving comfort of individual vehicle types. The wheel-rail system, which is subject to extensive demands in service, needs regular inspection to ensure operational reliability.
Friction-related mechanical wear on wheel sets is also a cost factor that must not be ignored. Therefore inspection measurements, which at the moment are still done largely by manual methods, must be made at regular intervals. Manual methods are very subjective and reading errors cannot be ruled out.
Stationary wheel profile measuring instrument
Based on these requirements the in-track measuring instrument offers essential advantages for measuring and saves a great amount of time and personnel in the recurrent inspection of wheel profiles. The recording of profile measured data and the diameter of wheel profiles is ensured for many different types of vehicles and wheel sizes by the laser-supported in-track measuring instrument.
The assignment of the nominal and maximum dimensions for the respective profile type and its monitoring is fully database-supported. Measurements on the wheel and assessment of wear can be performed quickly and easily.
Cost factor wheel profile wear
Long term analysis of the wear dimensions and profile inspections offer assistance in determining low-wear profiles. Optimum operating life of the vehicles (before re-profiling) can be determined based on wear behaviour.
Measuring principle and system concept
IWMS system has a modular design and is composed of two different subsystems dedicated to the reconstruction of the wheel profiles of each side of the track
Each of these subsystems is composed of another two or three independent modules that contain machine vision cameras and their corresponding lasers. These camera-laser modules provide the appropiate information needed in order to generate the complete profile of the wheel.
The number of modules part of the IWMS system depends on whether if it integrates wheel diameter measurement or not.
Wheel diameter measurement
IWMS system can optionally measure wheel diameters. The accuracy of this measurement depends on different aspects that are analyzed for each situation, such as location, fleet characteristics, speed of the trains, wheelset size, etc.
However, under normal circumstances an accuracy of ±0.5 mm can be achieved.
The complete wheel profile is measured by means of two OPTImess 2D laser sheet of light sensors whereby one sensor mea- sures the inside flat surface up to the top of the wheel flange and the second sensor the side of the wheel profile facing the rail. Both partial profiles are joined together in the processing computer and the profile parameters such as SD, SH, qR etc. are determined from this.
Speed measurement
IWMS standard system is able to generate the wheel profiles of trains traveling at speeds up to 15 Km/h, but it can be adapted to operate even at speeds >90 Km/h.
Additionally, IWMS system offers the possibility of measuring the speed of the train at the time the wheel profiles are obtained with an accuracy of 5 %.
The following standard evaluations are possible:
- wheel flange height, thickness and qR dimension
- wheel width
- back to back distance Ar
- track and guide dimension calculation
- wear history
- limit comparison
- nominal and actual profile comparison
- profile co-ordinates of every wheel
- measurement of wheel diameter
- monitoring of the diameter differences of the wheels on the whole vehicle, the drives and bogies
- interfaces for data transfer with central EDP systems, e.g. SAP
- vehicle detection by transponder


